Overview
The Example Project will be your primary way of interfacing with the plugin. If you desire, you can simply copy the Plugins folder over to any Unreal project you want, as long as it is made in 5.3. The Example Project should open into a testbed level, where a number of premade examples have been setup to showcase the plugin’s extensiblity and usage.
Note
If you encounter undesirable performance issues in the project, this may be due to Lumen being enabled. To disable this, go to the
Project Settingsand setDyanmic Global Illumination MethodtoNone

Project Structure
The core of the example project is the Test Level, which lives at the very root of the Content folder. All assets used by the project either live in one of the subfolders of Example, or come from Epic’s Starter Content. Core assets are divided into 4 categories, either a Blueprint, Material, Texture, or Mesh, however the Blueprints category is further subdivided into various types of assets, such as particle systems and actors. Each example in the project is separated into it’s own folder in the Scene Outliner for convenience
This is not anything you will have to manually concern yourself with unless you want to dive into an implementation, especially useful for the scripted examples in the second area.
Examples
Note
This document is rather long, detailing each example in the sample project. It is reccomended to navigate via the Table of Contents to save time or skip to a needed example
Example 1

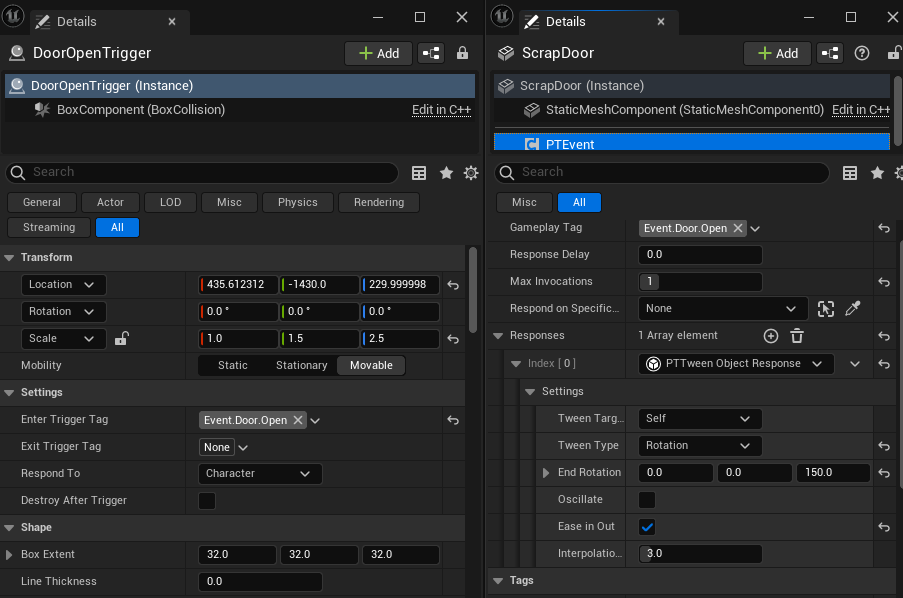
The first example is very simple, it features a shack with a closed door. Stepping up to the door allows the player to walk into a trigger. This trigger then broadcasts the Event.Door.Opened tag, which the door listens for using it’s PTEventComponent. This component then responds by triggering a Tween response set to manipulate the object’s rotation, opening the door.
Upon opening the door, the player can walk in, where they will hit another trigger that promptly changes all of the light bulbs to use an emissive material using the Change Material response, and activates a point light component using the Toggle Component Visisbility response. The lights in this example were compacted into a Blueprint for copy-pasting convenience, however this would work the same as separate actors.
Example 2
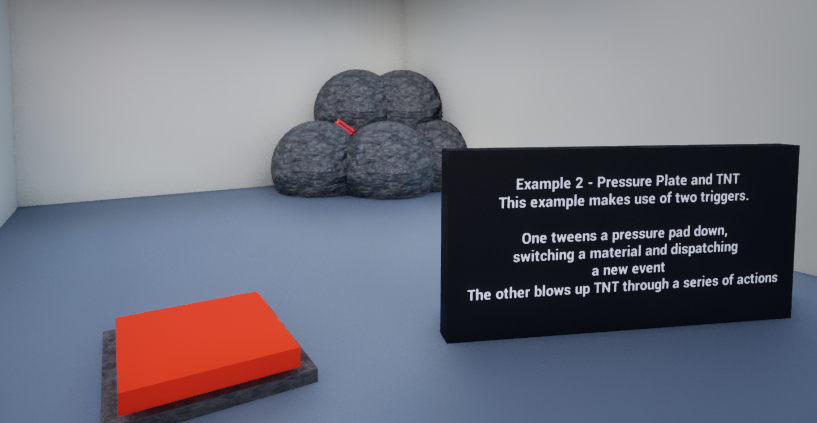
The second example showcases a largely new set of response objects. This features a pressure plate, which you can stand on to activate the TNT in the distance, blowing up the rocks and revealing the treasure behind. The first trigger is located at the pressure pad, which open entering broadcasts the Event.PressurePlate.Activated tag, which a secondary actor then listens for and responds by moving the pressure pad downwards using the Tween response in location mode, before waiting a second using the Delay response, then changing the material once again with the Change Material Response, and finally triggering it’s own event with the Event.TNT.Activated tag with the Trigger Event response.
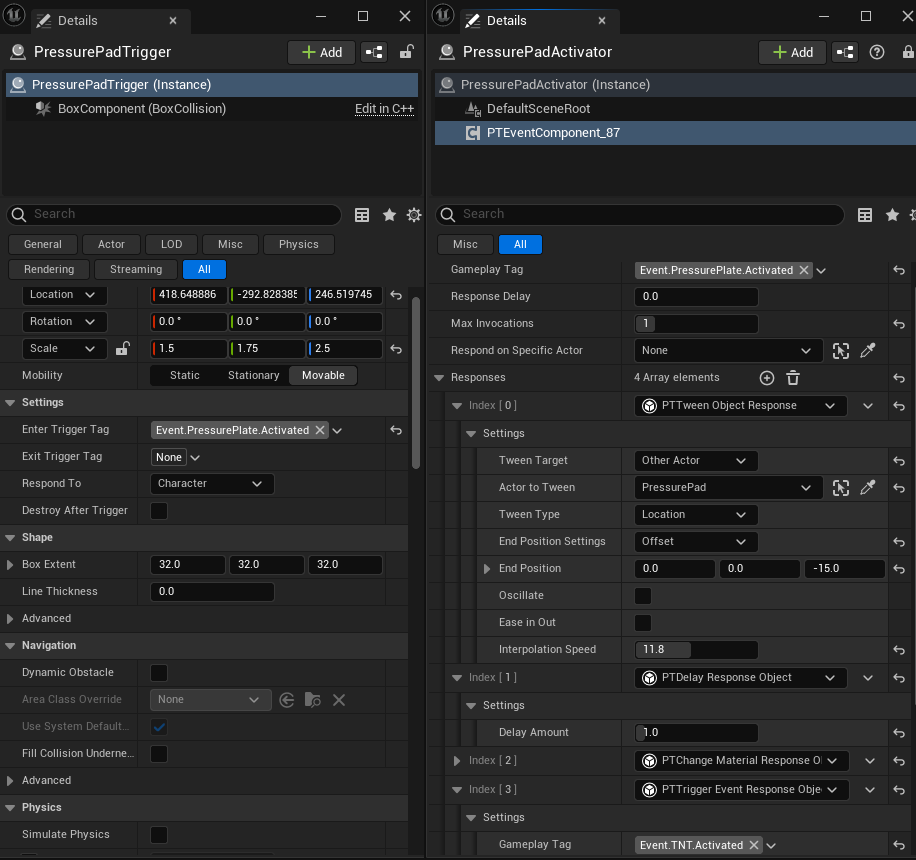
The tag fired off by the pressure pad causes a new response from another secondary actor, namely spawning a Niagara particle system with the Spawn VFX response, followed by an explosion sound via the Play Sound response, and destroying the TNT and Rocks with the Destroy Actor response. Normally this destruction would be shielded by the VFX to hide it, however the VFX used by this example is not large enough.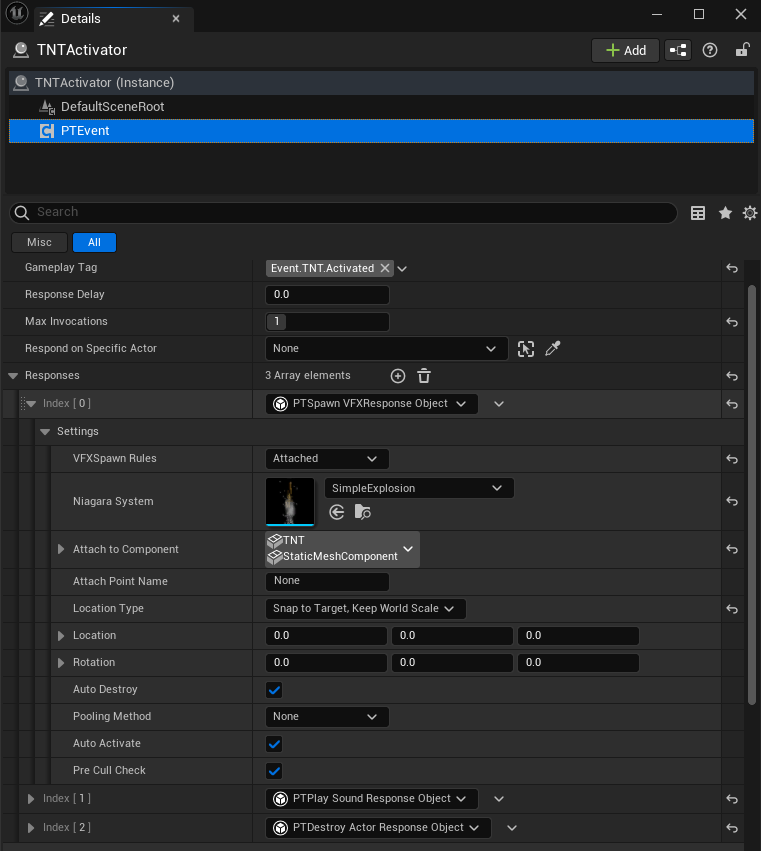
Example 3
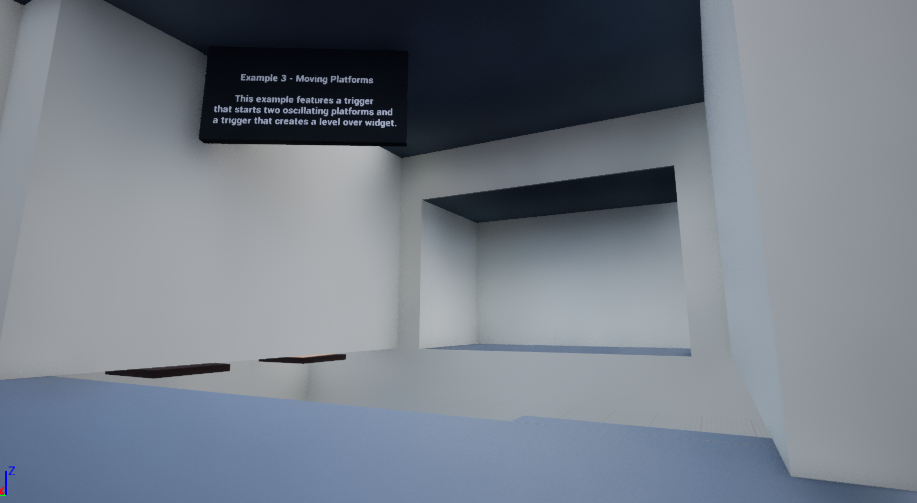
This example makes use of the Tween’s unique ability to persist it’s behaviour after execution. As mentioned in the Response Objects page, responses will move onto the execution of the next response after the initial response reports success. However, it is necessary in some cases to persist behaviour after this, in this case, we want infinitely moving platforms, but not to hinder the execution of other responses. This is achieved in a unique way that is further detailed on the aforementioned page, and the dedicated section to the Tween response.
In this case, a trigger spans the distacne of the opening, firing off the Event.Platforms.Triggered tag. A secondary actor then responds to this, by activating the first moving platform to oscillate between it’s start location and the position of another actor with the Tween response, delays a short time with the Delay response, and then triggers another platform in the same way.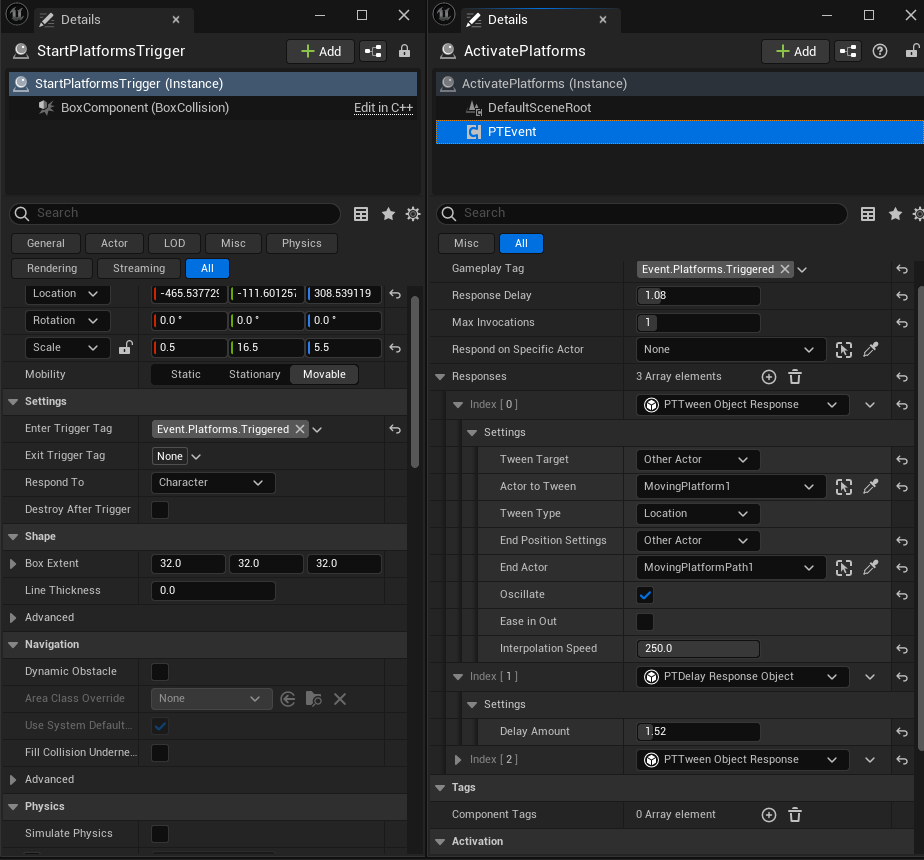
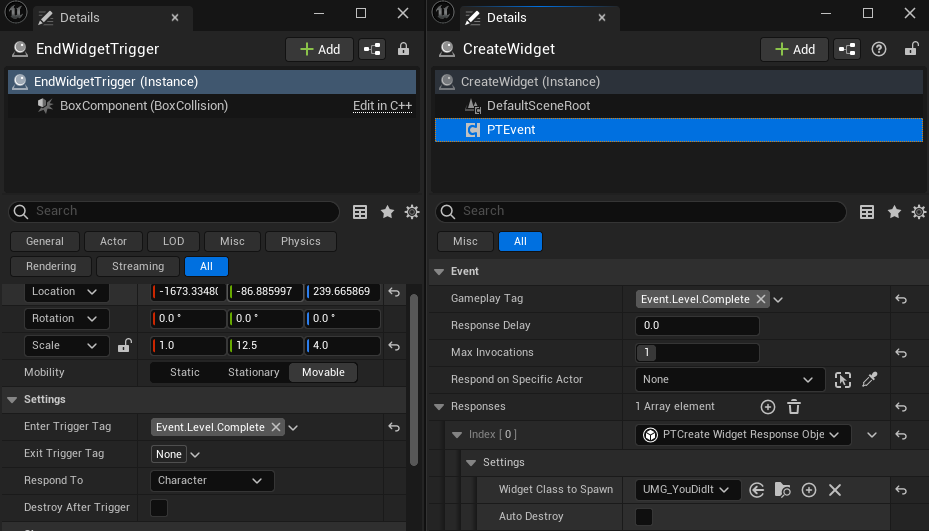
Once the user reaches the other side, another trigger is set up at the goal which simply uses the Create Widget response to spawn a Level Complete widget.
Note
If using PIE (Play In Editor), the widget’s functionality to use the mouse cursor will intefere with the viewport, requiring a click to close the button and another click to refocus back to the game to move around again.
Example 4

This example features 4 buttons that control a cube. At some position a green target lies, where the player must operate the buttons to make the cube move into the target zone. Each button has a trigger which when entered by the player fires of a tag representing the button’s direction, such as Event.Button.Up. Each of these have a corresponding response component, which will once again use the Tween response to move the object in a cardinal direction.
Warning
The way this example is setup makes it possible to step on multiple buttons at once. I’d advise if copying this, that you change the system to only allow one button at once, perhaps by moving it out of the way. This is because affecting the same object with multiple tweens at once will result in a combination of both
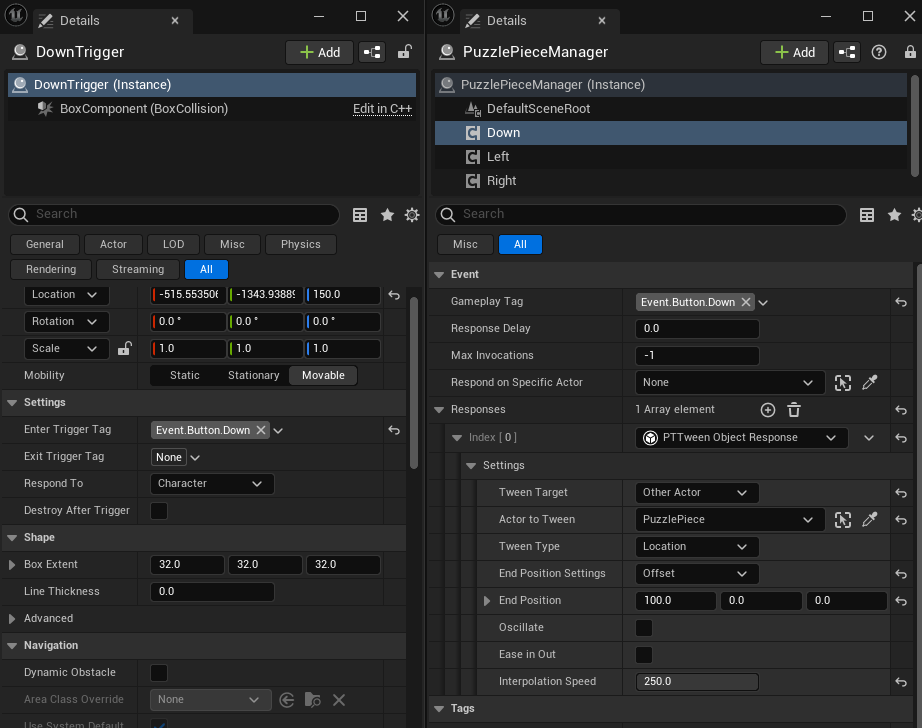
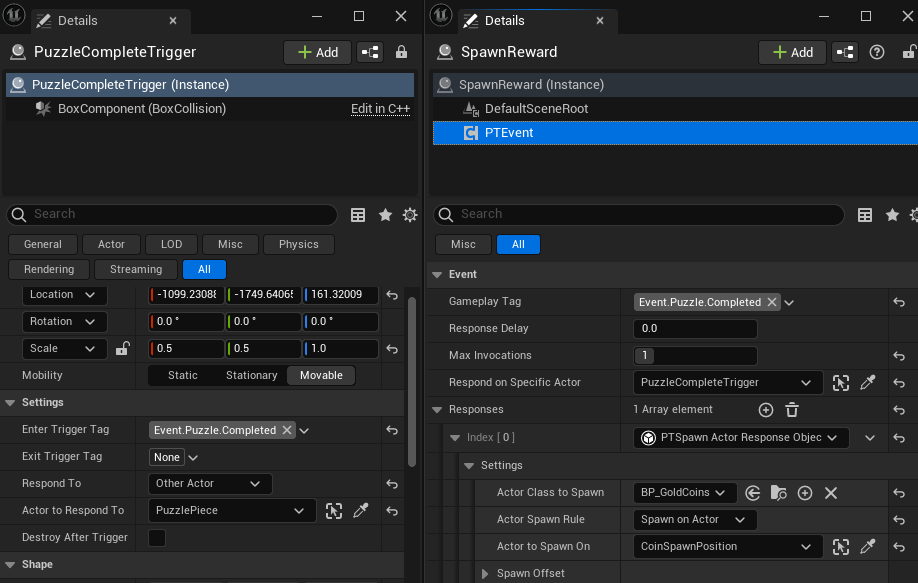
Once the block makes it’s way into the green target zone, a new response is fired off, one that can only be triggered by the block. This response takes the form of the Event.Puzzle.Completed, which spawns an actor containing a pile of gold coins along with a sparkle VFX at the position of another actor. You could do whatever you like in another case, common scenarios could include opening a door, or destroying a blockage.
Scripted Examples
Note
The following examples require some basic knowledge of UE5’s Visual Scripting system called Blueprints. These examples and their scripts are explained in depth in the dedicated page, however knowledge of the general Unreal framework is still advised to properly leverage them.
Example 1
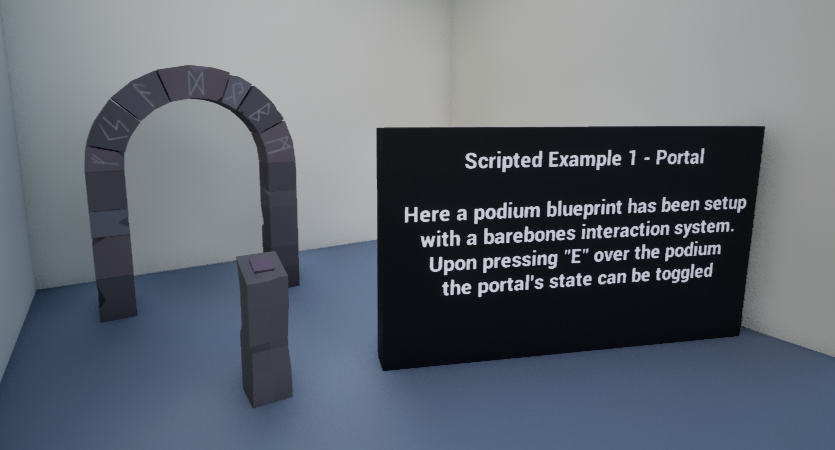
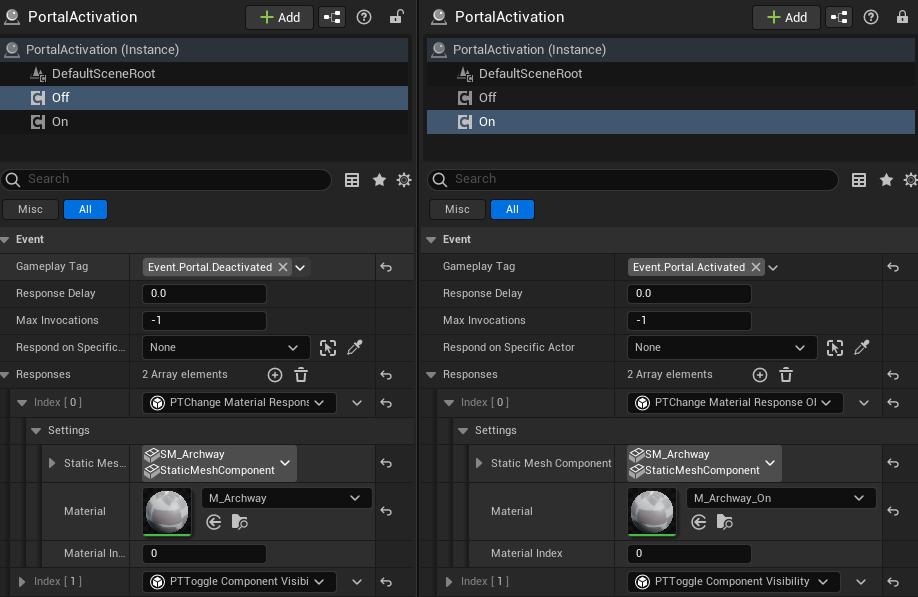
This example shows some very simple usage of making a custom trigger object. Here the character makes use of a very barebones interaction system (Feel free to make use of it in your own levels), and upon walking up the pedestal and pressing the interact key, E, the user can toggle the state of the portal. All responses are the premade ones, however this showcases an interactable trigger that changes it’s broadcast tag based on what state it’s in. In this case, interacting with the pedestal sends Event.Portal.Activated and interacting a second time sends Event.Portal.Deactivated.
The portal is set up with a secondary actor that has 2 response components, 1 for each tag, with one enabling visibility of a portal mesh and changing the archway’s material to an pulsing emissive one, and vice versa.
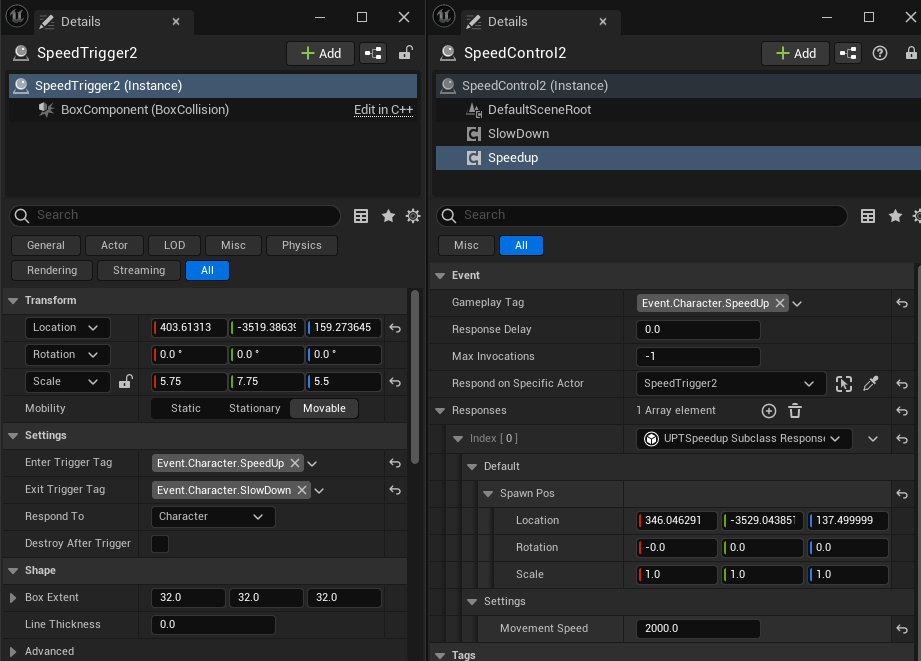
Example 2
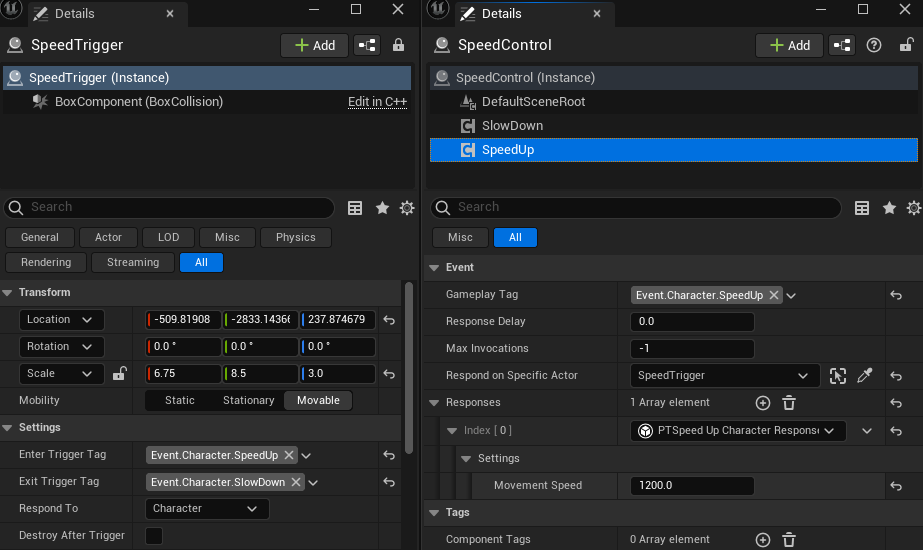
While this example is not very visually impressive, it contains a core part of extending the plugin with scripting knowledge; the ability to subclass responses in blueprints. More specifically this response makes use of entering and exiting the trigger to send different responses, and invokes a custom made response to speed up and slow down the character. The trigger fires off the Event.Character.SpeedUp tag when entering, and the Event.Character.SlowDown tag when exiting. The corresponding response only listens for this tag from this specific trigger, which is important as we later reuse the same tags in Example 4.
The custom response is very simple. It subclasses the base response as any response should, and simply has a property to allow the user to set the speed that the character will walk at.
Example 3

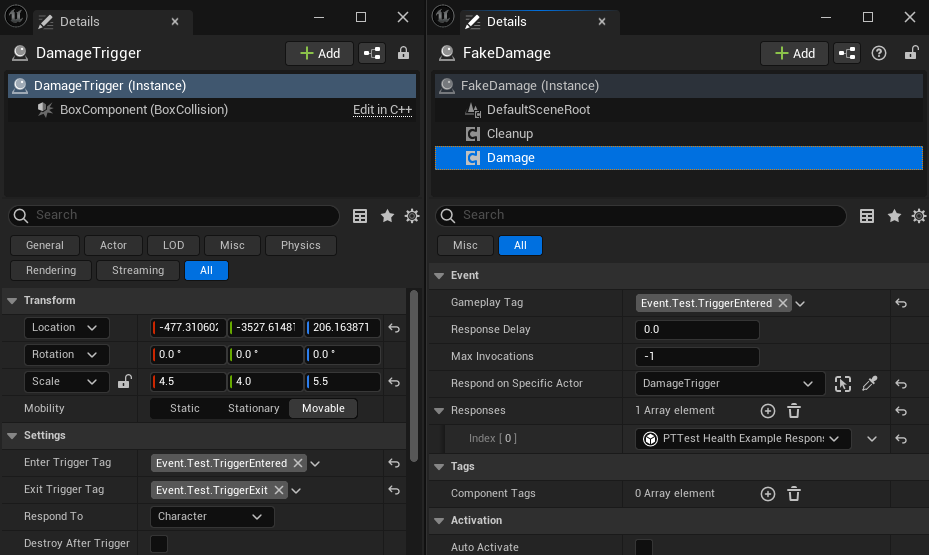
This response showcases more advanced usage of scripting, by way of a pseudo “poison cloud”. Upon entering the trigger the Event.Test.TriggerEntered tag is sent, after which another actor executes a custom response. This response does a few different things. Firstly it retrieves the player controller and creates the health bar widget. It then sets a timer up to recurr every 0.5 seconds executing an event that subtracts 0.5 from the health bar, giving the illusion of damage taken. Lastly, it saves a reference to this widget and a handle to the timer in a temporary actor.
Note
It is advisable to follow a pattern similar to this for custom responses that invoke temporary world behaviour, if this is not already setup via other classes. Since response objects stay “alive” even after success, failing to properly cleanup when needed will result in unwanted behaviour, in this case the timer still infinitely ticking and the health bar remaining on screen.
After exiting the trigger, the Event.Test.TriggerExited tag is broadcast, where a second new response object is invoked that finds this temporary actor within the world, removes the widget from the viewport, and clears the timer to ensure no behaviour remains active.
Example 4
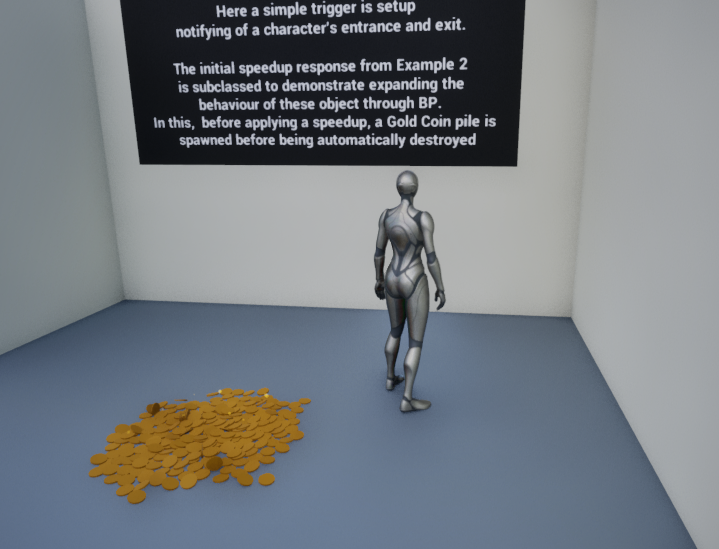
This is another rather simple example using the same setup from Example 2, this time demonstrating how a response made in Blueprints can be effectively subclassed. In this, we talk the default speed response and subclass it, upping the speed in the details panel a bit more when compared to Example 2, but also before applying the speed we spawn a pile of gold coins at a location specified in the details panel. After success, we delay for a second and destroy the spawned gold coins.
Exiting the trigger is just as simple as Example 2, using an identical response to slow the character back down. Since the subclassed response handles it’s own cleanup, we don’t need to perform any extra actions here.